Costume and textiles
We mount a variety of textiles for display from large flat textiles such as banners, flags, wall hangings etc, and from small textiles such as samplers to three-dimensional objects such as costumes and their accessories. We can also complete mounting of small flat textiles by framing them.
We prepare mounts that ensure textiles are fully and securely supported using conservation-grade materials. We can dye a range of fabrics to your colour specification and make textiles to replace missing ones, for example to complete an outfit. After deteriorated textiles are treated by means of conservation it is usually possible to mount even the most damaged ones for display.
Mounting 1744 wedding garters for display
In the 18th century stockings were not elasticated, and to hold them up they were tied with garters in a bow just below the knee. In 1744 Sarah Handy received this pair of hand-woven 190cm long silk garters to commemorate her marriage to John Pemberton. The wedding garters had since been passed from bride to bride in the family.
The old display mount of the garters (photo 1) had the names of all the couples, who had had the garters associated in their weddings, written on it. The owner asked us to re-mount the garters in order for her daughter’s name to be added to the list in preparation for an approaching family wedding.
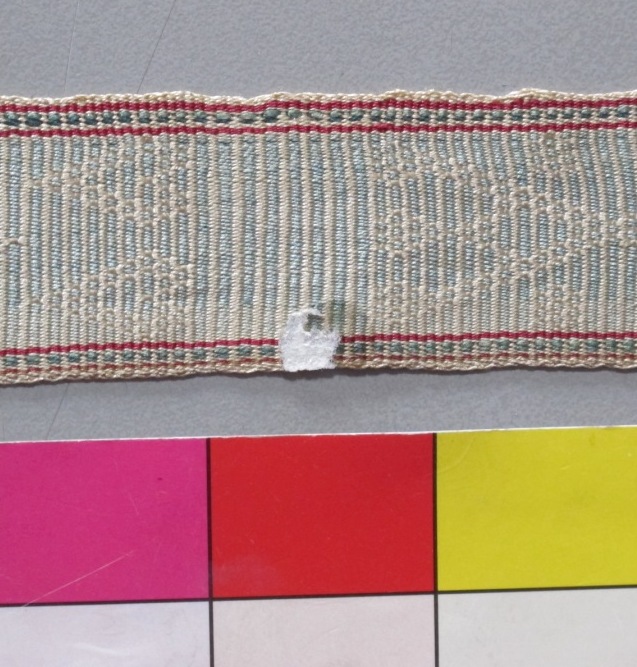
The garters had previously been mounted on non-archival quality card with 16 small spots of adhesive. The close to 300-year-old garters had suffered from exposure to light, they were slightly stained and had a small number of minor losses. However, they retained their flexibility and were still structurally relatively sound.
The garters were separated from the old mount, and the adhesive spots on the back of the garters were successfully removed with organic solvents (photos 2 and 3). A new, chemically stable, fabric-covered mount was made, and the garters were attached to it using a layer of fine nylon net. The net was dyed to tone with the garters. The edges of the net were tucked behind the edges of the garters, and by stitching through only the edges of the net it was possible to fix the garters to the mounting without stitching through the garters themselves. This way it will be easy and safe to separate the garters from their mount if necessary in the future.
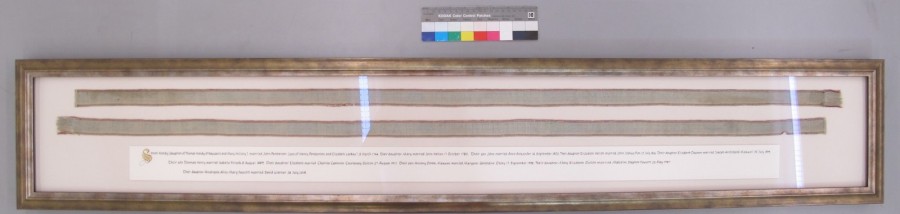
A calligrapher wrote a new plaque of acid-free card with the family names for the mount. The old frame was insufficiently deep and of a flimsy construction for the garters to be mounted in it again. The garters were archivally framed under the best quality glass in a frame of the Client’s choice (photo 4). She presented the garters to her daughter and husband to be the evening before their wedding.
Protecting textiles on display under glass is of huge importance. With attention paid to the display environment of the garters they have a chance to be preserved for at least another 300 years.
‘The garters are absolutely breathtakingly beautiful, stunning and it is such a lovely feeling to be able to relax now knowing they are safe. Tuula thank you so much you couldn’t have done a more perfect job! Once again thank you so much for your part in this extraordinary journey!’ Mary Fawcett


Mounting costume for display
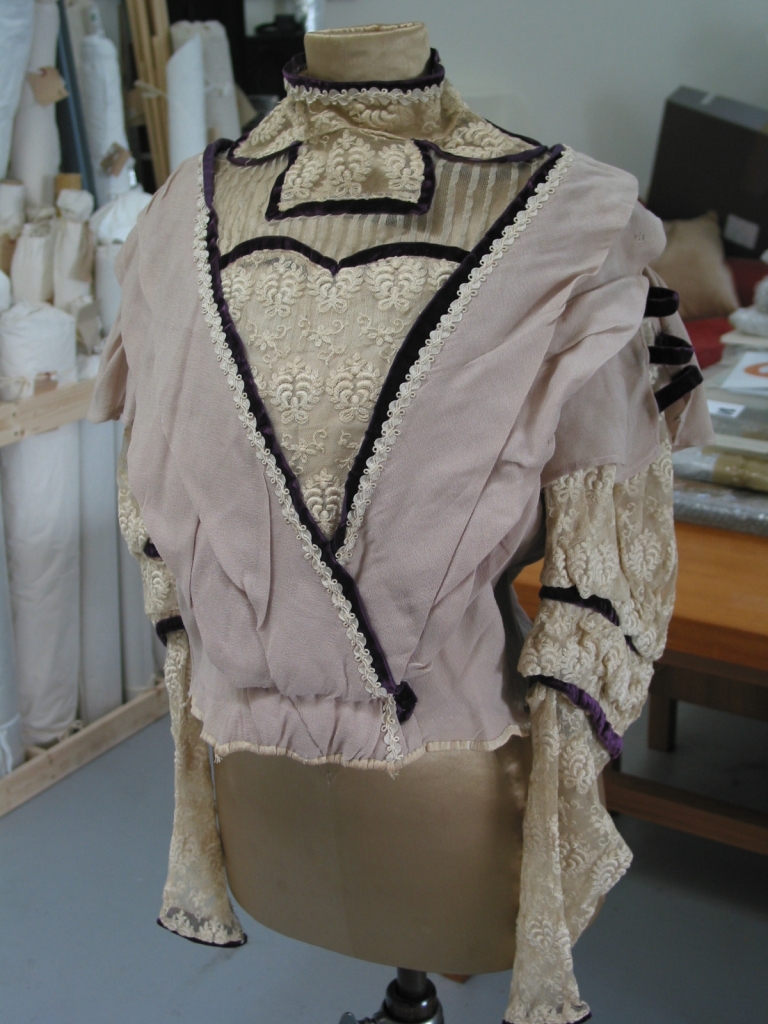
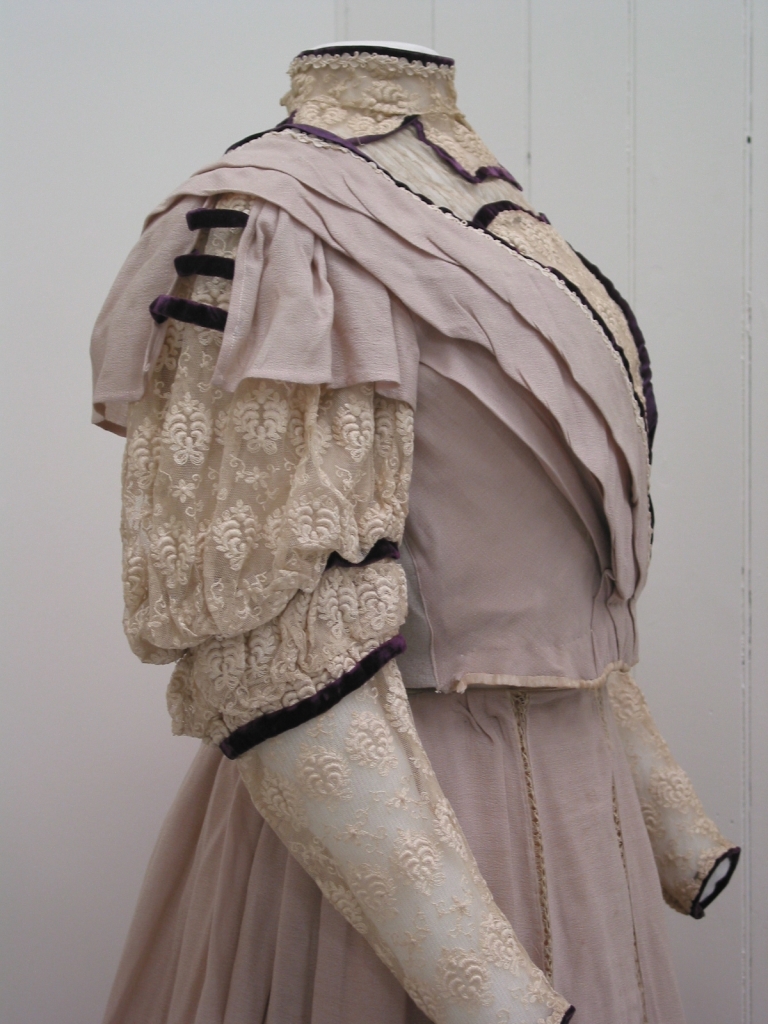
We mount costumes and their accessories for display. A range of display figures and mounts can be used, depending on your requirements. The most cost-effective and safe way to mount costume is to use a conservation-grade display figure, built up to the size and shape of the person who would have worn the outfit. This allows interpretation of the outfit in its authentic historic stance as fashion has changed over the centuries. This three-dimensional sculpting work with polyester wadding, stitching and fabrics can involve constructing supportive petticoats for skirts, supports and arms for sleeves, reproduction of missing garments, and so on, as appropriate.
We can help you in selecting costumes and accessories for exhibitions by assessing their condition and estimating the cost of any conservation treatment that they may require to make them safe for mounting and display. This helps you in budgeting and planning for an exhibition.


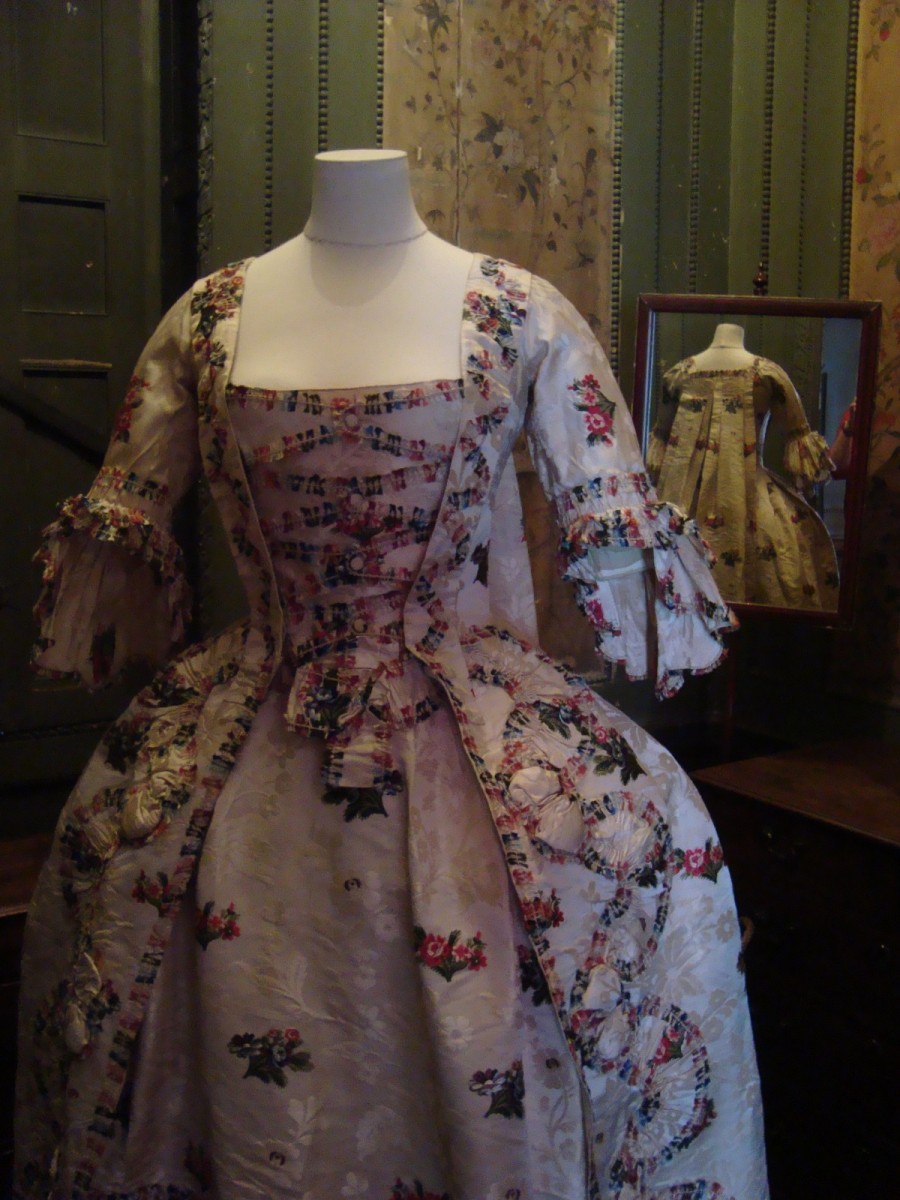
Conserving and mounting an 18th century dress for display
We conserved and mounted this two-part 18th century silk sack-back dress for display in Newhailes House, one of the National Trust for Scotland’s historic houses. Conservation of the dress and its petticoat involved stitched support work in areas of damage with silks dyed to tone in with the original colours of the outfit. Treatment also included relaxation of the creases of the sack-back dress and its petticoat after years of folded storage.
We mounted the outfit for display by building up a conservation-grade display figure to its measurements with polyester wadding. As the dress no longer had its original petticoat we made a boned petticoat to support the skirt on display. We installed the dress on the prepared display figure in the House.


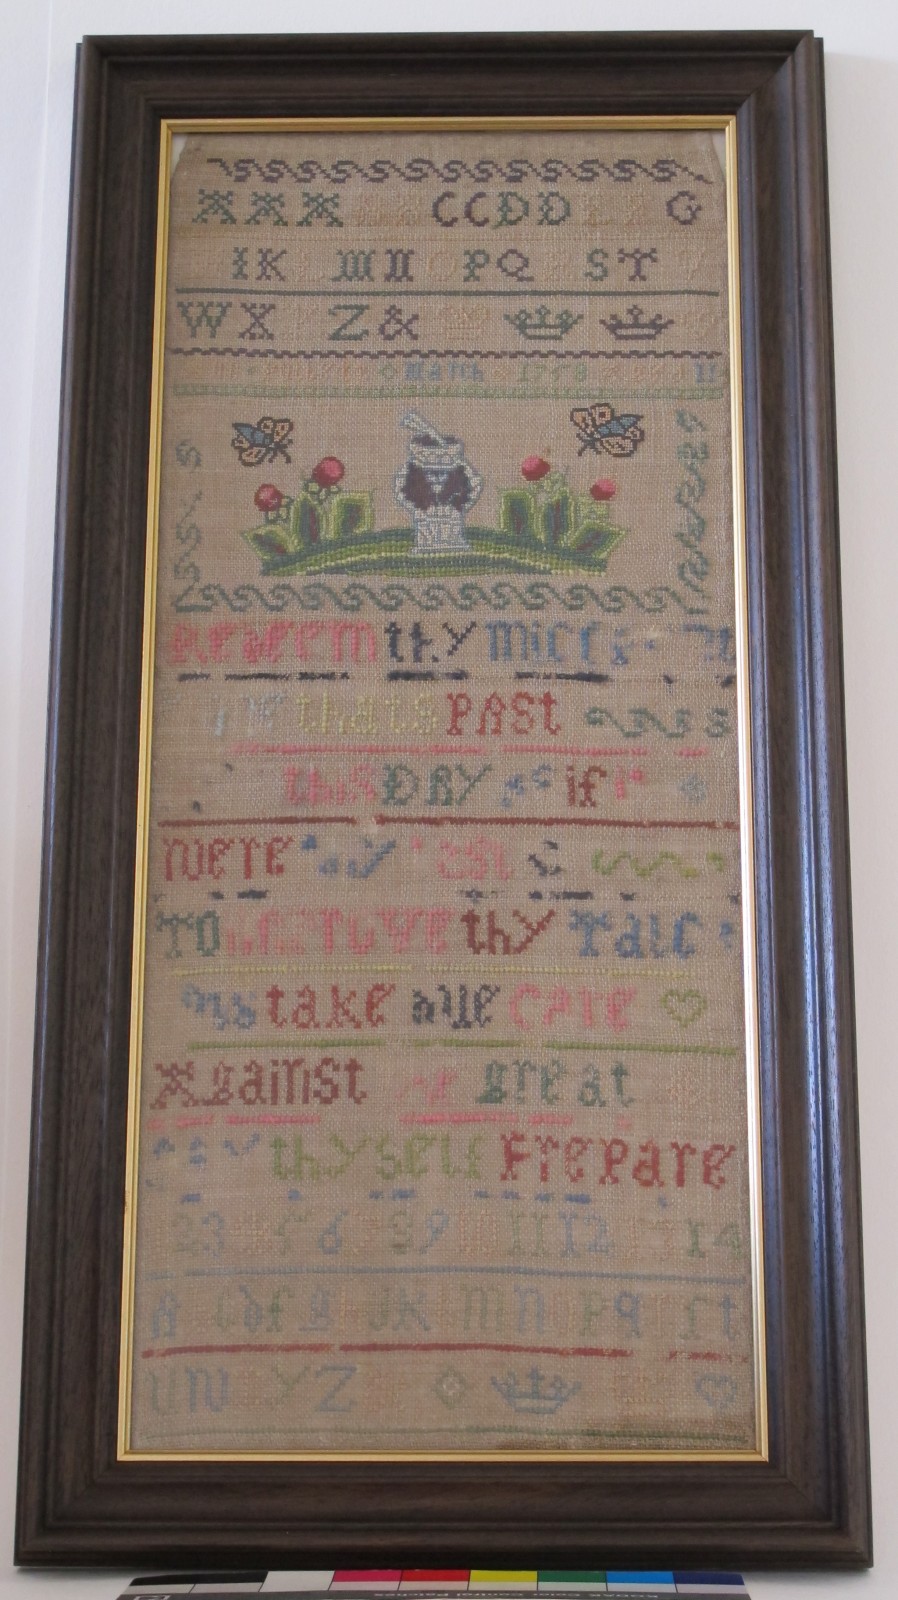
1758 sampler
This 1758 sampler had been stored rolled up, and the private owner asked us to prepare it for display.
After dye testing showed that the dyes of the embroidery threads would remain insoluble in water and detergent solution, the sampler was wet-cleaned, re-aligned and dried. A support board was made for it out of chemically stable card and fabrics. The sampler was sewn on to this.
As no frame existed, we supplied the sampler with a frame and high-quality glass, modified the frame to conservation standards and framed the sampler in it. Just like prints and drawings, samplers and other textiles are best protected under glass against the deleterious effects of their environment in the long term.


Conservation and mounting of two late 19th century Infantry Colours for re-display in a church
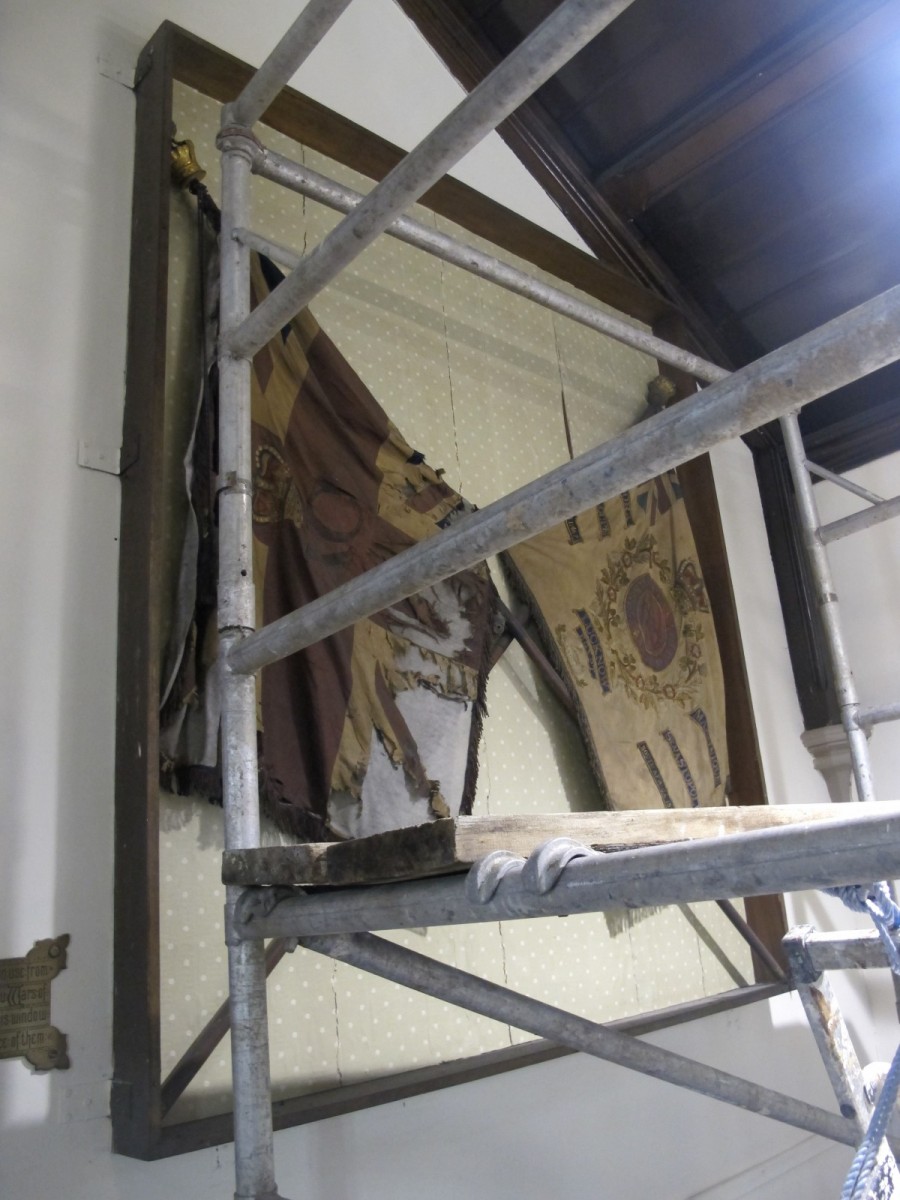
Two late 19th century Infantry Colours had to be taken down from display in a church due to extensive building renovation. This provided an opportunity for assessing the Colours’ condition and to re-consider their display.
The method of hanging the Colours for display from poles for a long time had distorted them. Long-term exposure to light had also caused the Colours fade unevenly. The Colours’ display case was unsealed, allowing the Colours to become severely soiled.
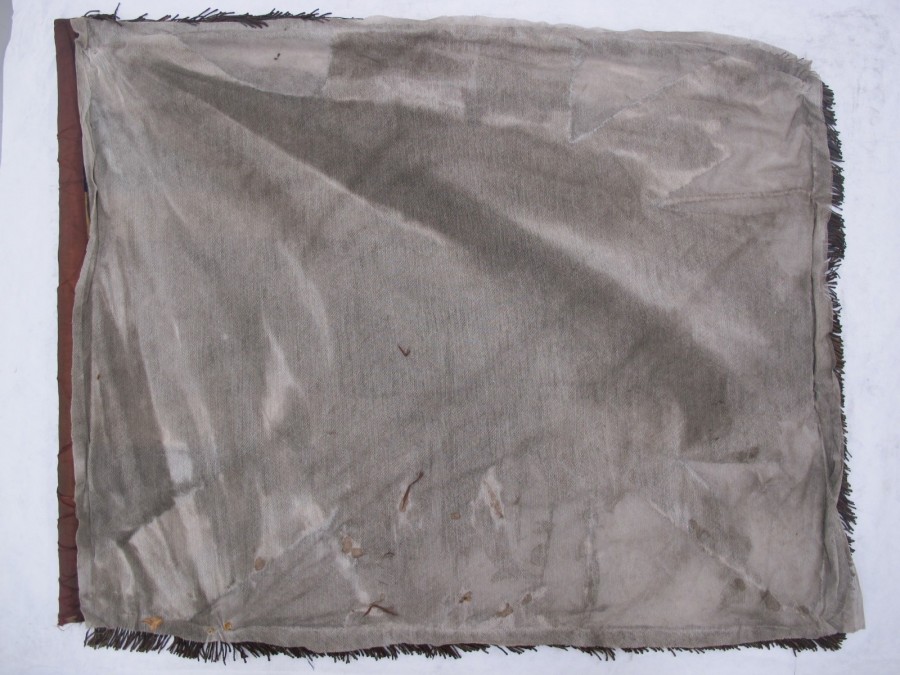
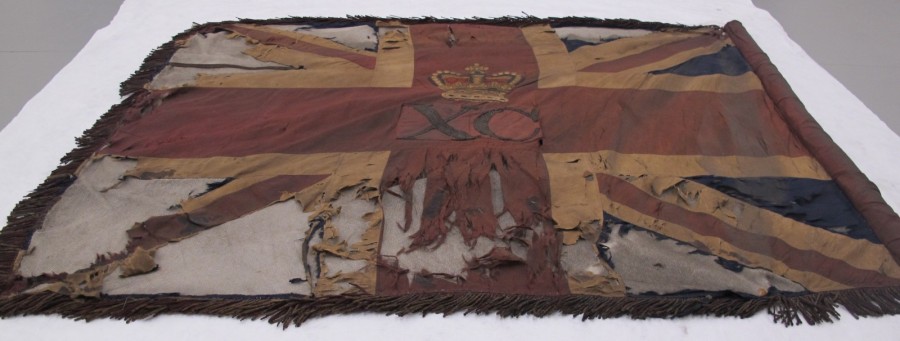
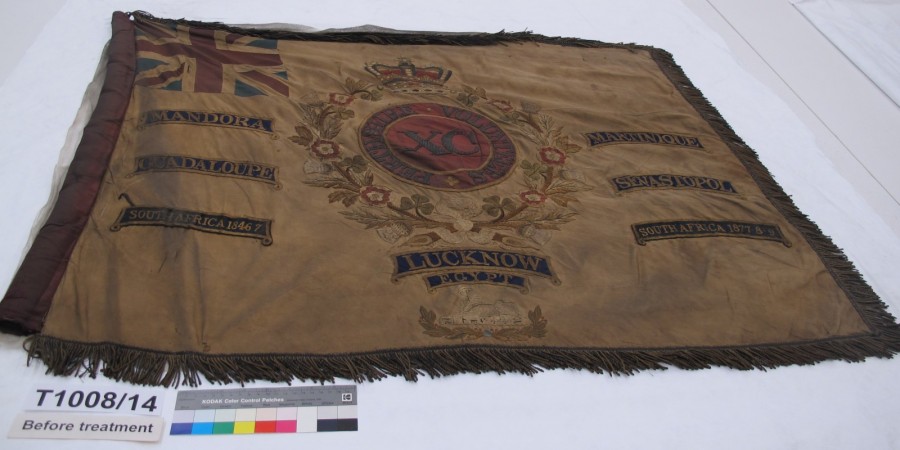
The Colours had previously been sewn onto two layers of thick cotton netting. These had been stitched on to the front of one of the Colours and on to the back of the other Colour. The random and crude stitching gave insufficient support to the Colours and allowed them to carry on deteriorating. The King’s Colour, on the left in the first photograph, had suffered especially significant losses.
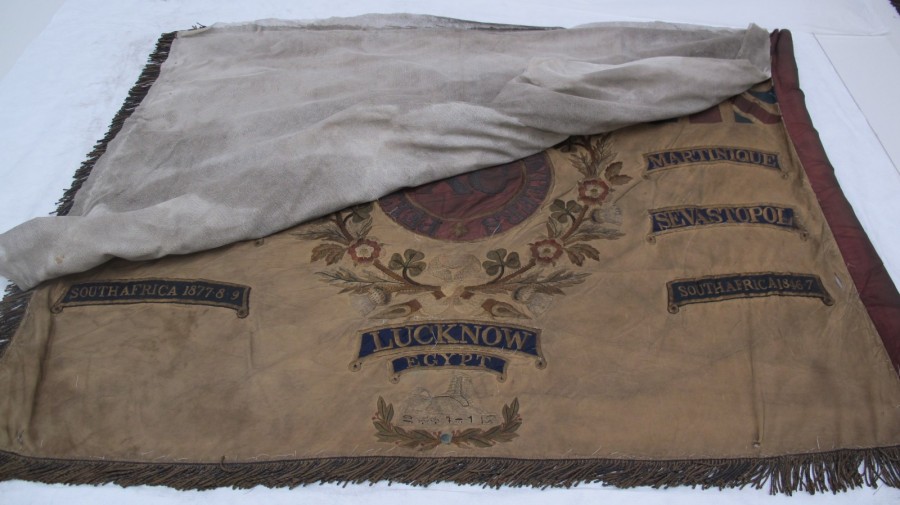
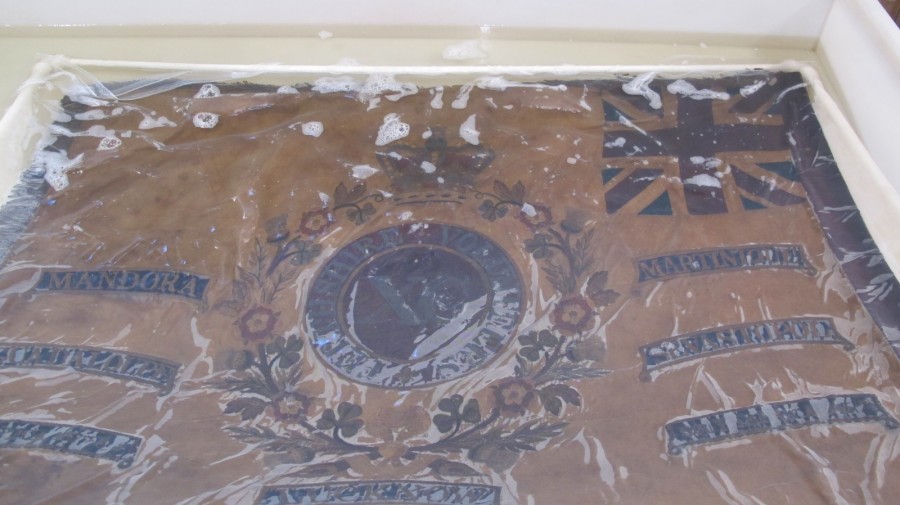
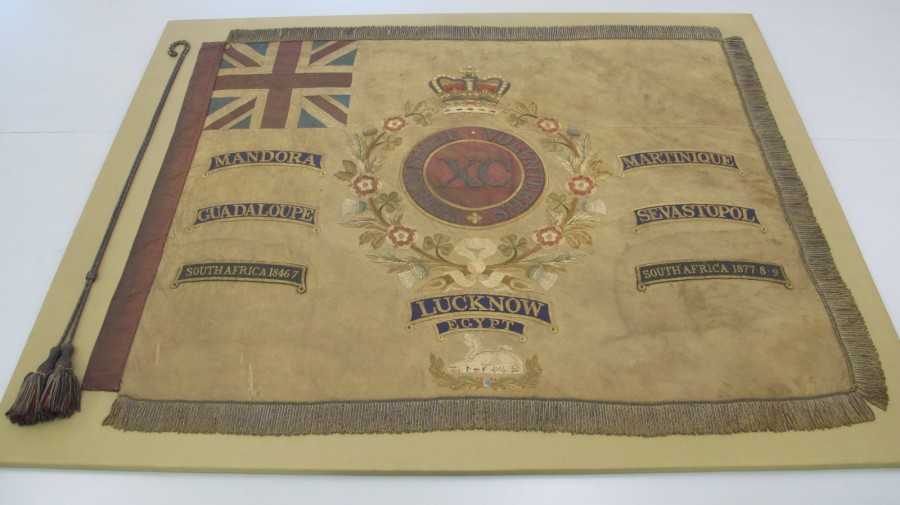
We took the Colours off their display wall in the church and packed them for safe transport to our premises. The conservation of the Colours involved wet-cleaning them, dyeing silk materials to support and protect them and to camouflage losses in them. Both of the Colours were stitched on to fabric-covered mount boards for support. Each mounted Colour was placed in a specially commissioned protective glazed display case and the Colours were returned to a wall in the church. This provided a better environment for their display than the previous wall and case had done.


Transforming an embroidered cushion cover to a textile displayed on a wall
The back of this velvet cushion cover was worn beyond repair but the embroidered front, although soiled, was still physically in a good condition. The Client asked us to clean the front of the cover, mount and frame it for display so that he was then able to give it to his grand-daughter in memory of his wife, who had embroidered the picture.


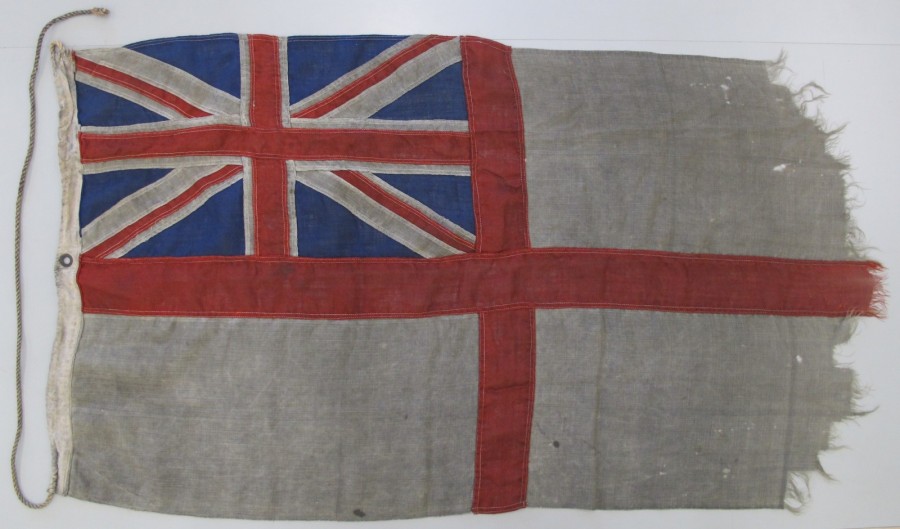
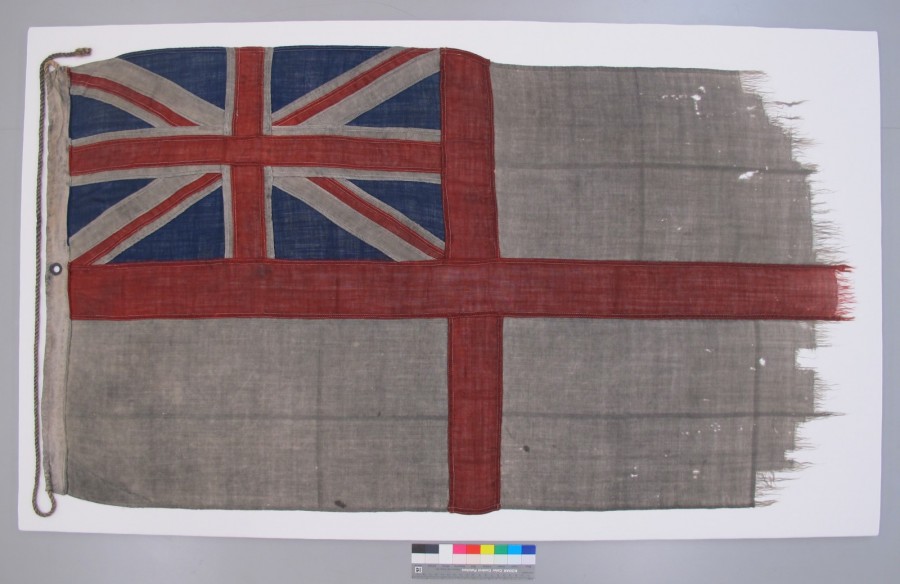
Mounting a naval ensign for display
This ensign was needed for an exhibition in a museum without cleaning to show what it looked like when it flew from the mast of its vessel. It was first straightened with a contact humidity treatment. Then it was sewn on a fabric-covered support board for display on the wall of a display case.
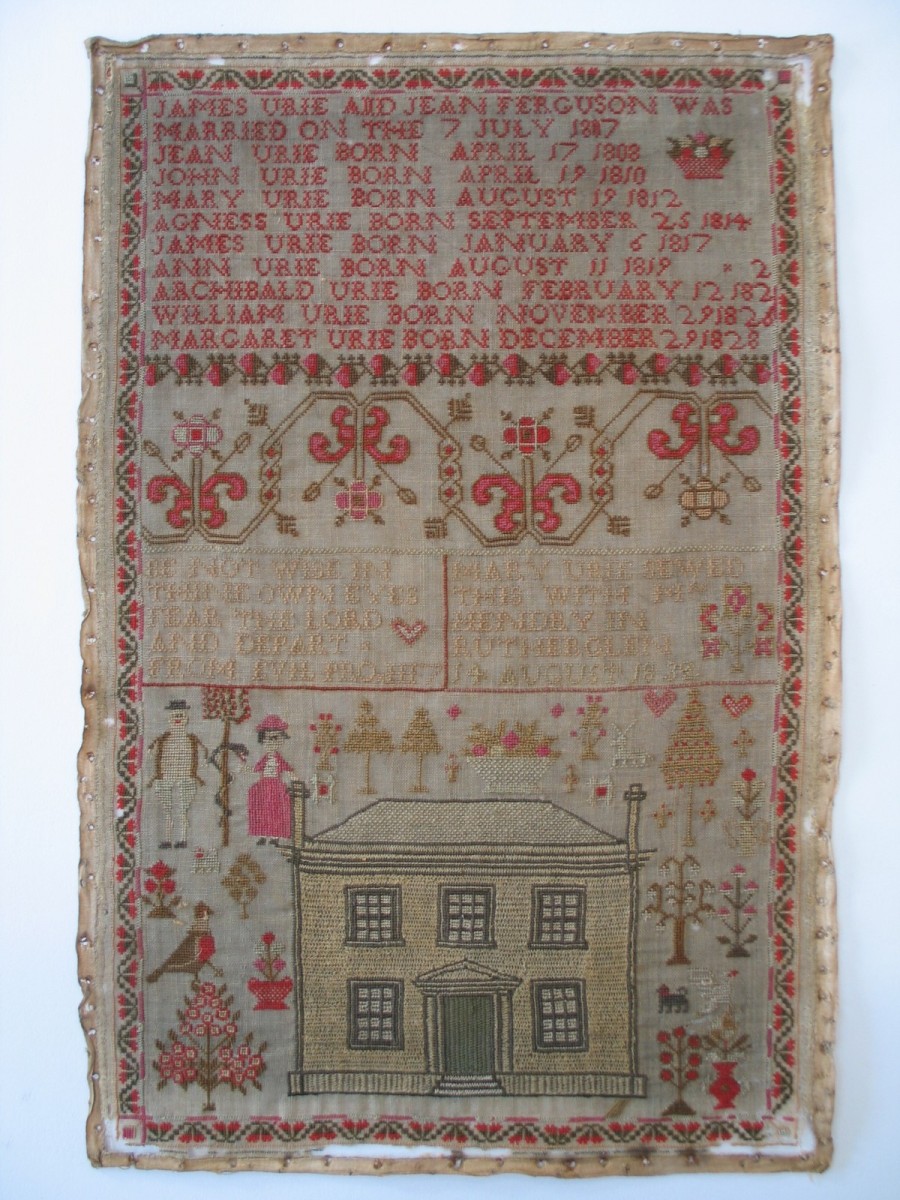
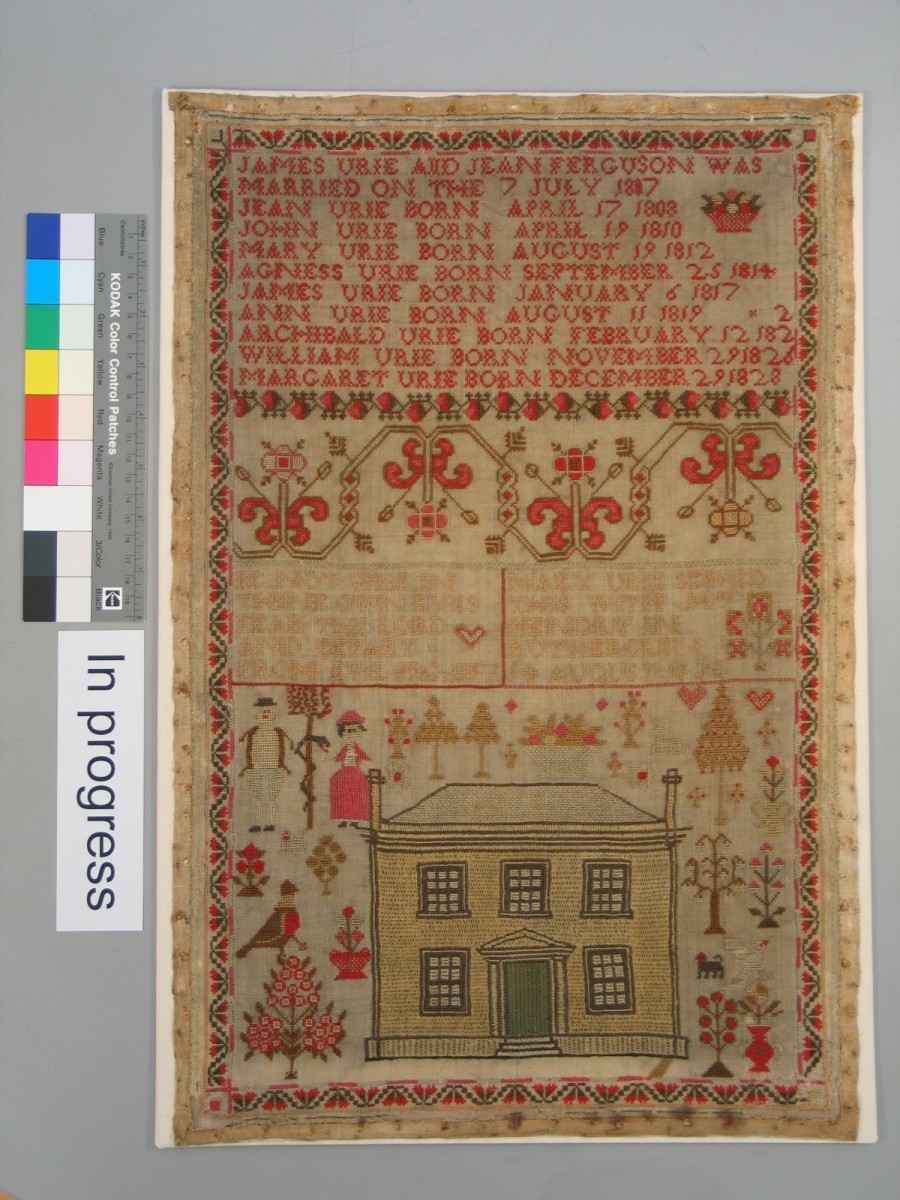
Re-mounting and re-framing 1832 sampler
In the past, insect larvae had damaged the woollen ground fabric of this framed sampler by eating holes in it. As the sampler was removed from its frame, it was discovered that it was attached to a wooden stretcher frame with corroded tacks. It was agreed with the Client to clean the sampler, and to re-mount and re-frame it.
87 tacks that were holding the sampler to the stretcher frame were pulled out in order to release the sampler from the frame. These left small holes with corrosion staining on to the sampler’s edges.
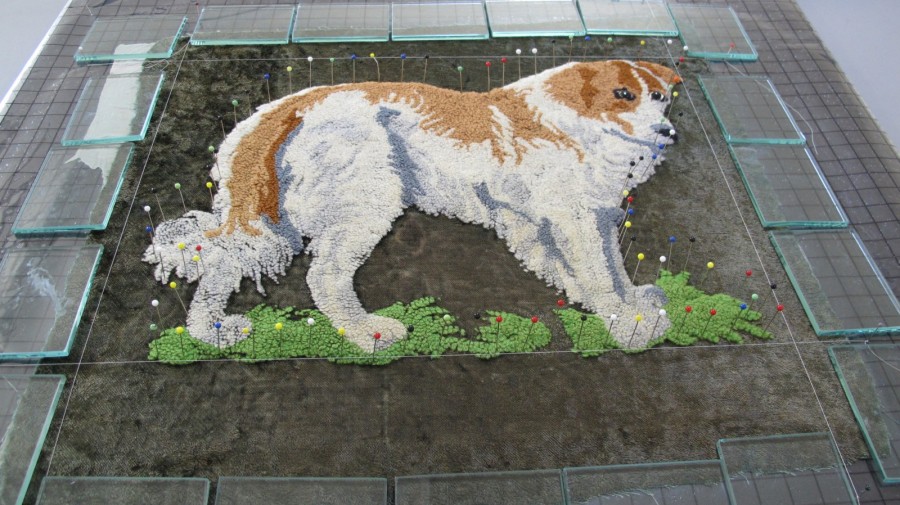
The sampler was cleaned by controlled vacuum suction and in a detergent bath. It was rinsed and then re-aligned, pinning it down to dry it as straight as possible. It was mounted by sewing onto a fabric-covered support board without harmful corrosive tacks, degrading self-adhesive tapes or excess tension. Layers of dyed conservation-grade nylon net of a closely toning colour were laid under the holes of the sampler on the mount in order to camouflage the holes in the sampler's ground fabric.
The sampler was framed in a new frame, with a new acid-free window-mount that covered the holes of the sampler’s edges.


Treating and mounting an 1850’s dress and jacket for an exhibition
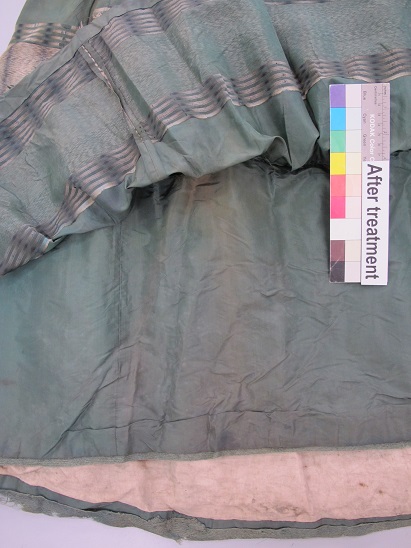
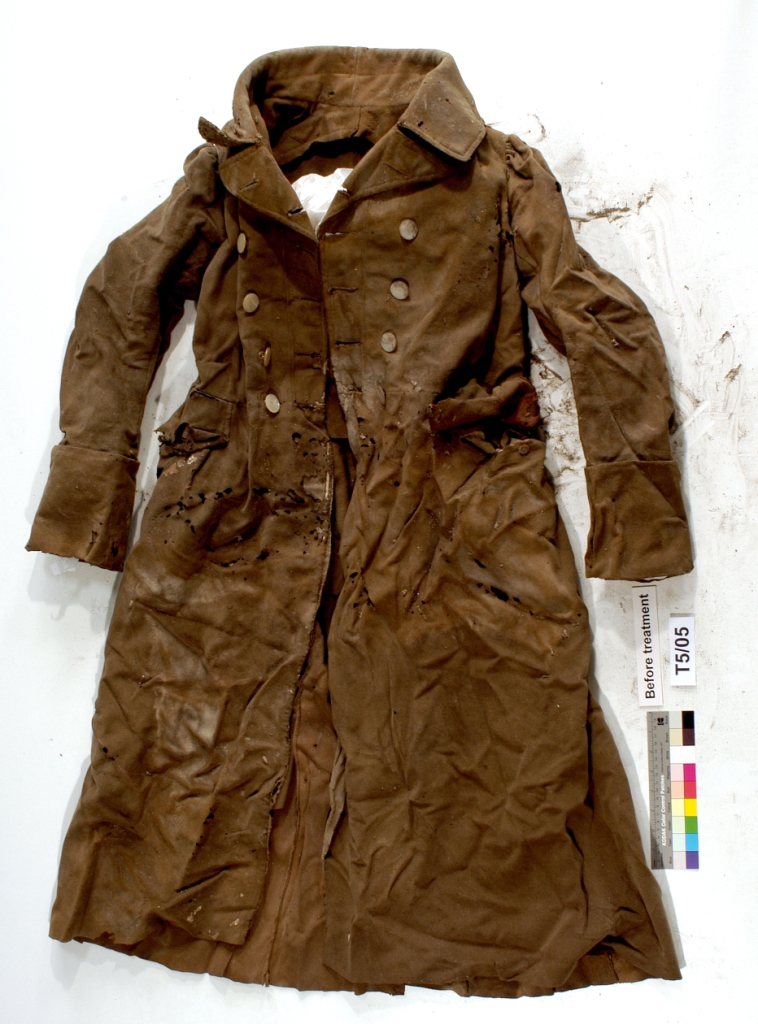
This hand-sewn green silk day dress, typical of 1850’s fashion with its pagoda sleeves and full flounced skirt, had become wet at some point in the past. As it had not had a chance to dry, the damp areas had started growing mould. The mould was present mainly on the skirt, both on the outside and underside of the flounces and skirt as well as on the skirt’s lining. In places it had changed the colour of the silk from the blue-green to a yellow-green. The dress, and its accompanying jacket, were also badly creased due to their past crammed storage conditions. Both were in a condition unfit for display without conservation.
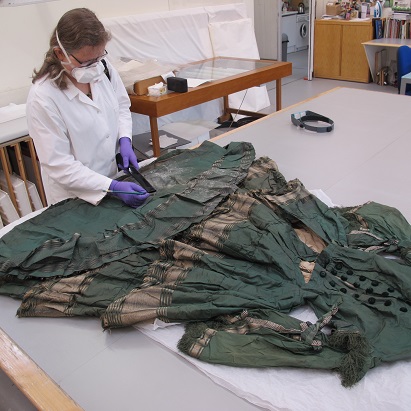
As the green dye of the dress proved to be soluble in water, water-based cleaning wasn't possible. The visible mould was removed by brushing and controlled vacuum suction. The most significant creases of the dress and jacket were then also relaxed with moisture in order to prepare them for display.
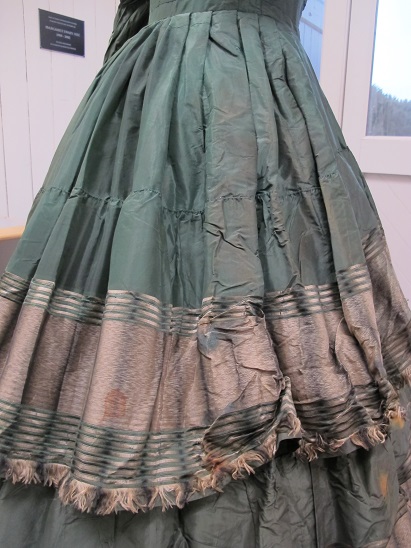
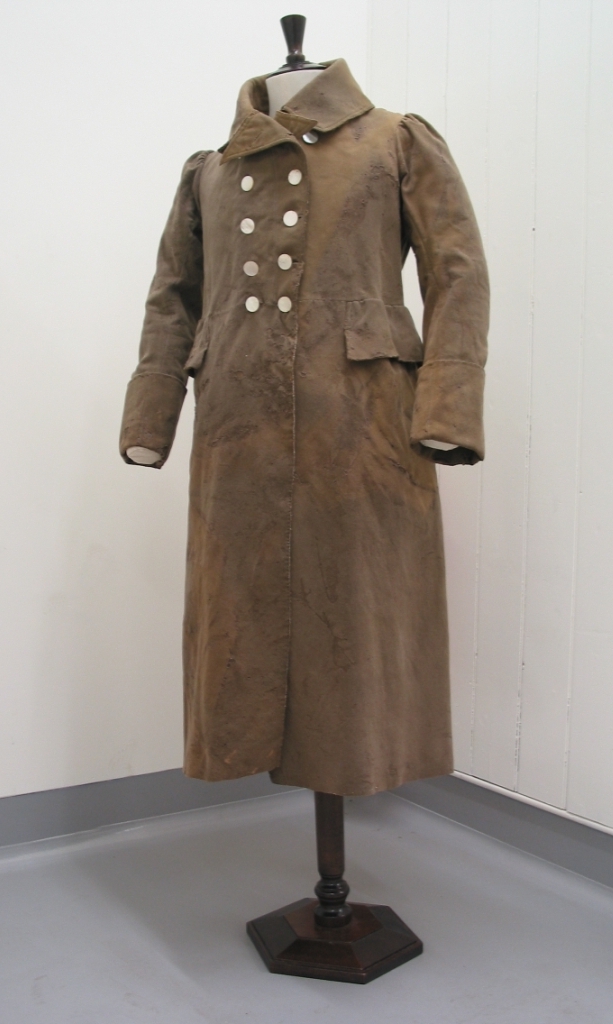
A display figure was padded to fit the measurements of the dress and jacket with polyester wadding. A petticoat was made to support the skirt of the dress.
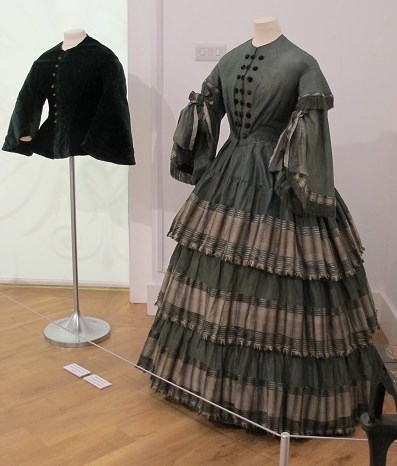
The garments formed part of a three-months long exhibition, ‘A Stitch in Time – a Story of the Sewing-machine’, at the Clydebank Museum in spring 2017. The exhibition described the development and history of the Singer sewing-machines, which were manufactured locally for the period of about 100 years from the late 1860’s. The exhibition also examined how the invention of the sewing-machine affected dress-making.
The conservation work and mounting of the garments was funded by The Costume Society Elizabeth Hammond grant to the ClydebankMuseum.